Running system on riscv64-gr765-vcu118 
These instructions describe how to run Phoenix-RTOS on the GR765 processor configured on the AMD Virtex UltraScale+
FPGA VCU118 board - riscv64-gr765-vcu118 target. Note that the build artifacts, including the system image should be
provided in the _boot directory. If you have not built the system image yet, please refer to the
Building Phoenix-RTOS image section.
Connecting the board
Power on the board and connect it to the computer using 2 micro USB cables that provides JTAG and UART communication.
Loading the Phoenix-RTOS system image
To load the Phoenix-RTOS system image to the board, you will need to use the GRMON debug monitor. Note that the
Professional version of the GRMON is required to run the system on the GR765 target.
How to get GRMON
Download the GRMON software from the official website.
After downloading the archive, extract it and optionally add the
grmonbinary to thePATHvariable.Install Digilent Adept Runtime for debug link connection as described in the GRMON User’s Manual.
Launch the GRMON monitor using the following command:
grmon -digilent
The -digilent parameter specifies the Digilent JTAG adapter.
Load the Phoenix-RTOS system image to the RAM by running the following commands in the GRMON:
load _boot/riscv64-gr765-vcu118/sbi-gr765.elf
load -binary _boot/riscv64-gr765-vcu118/phoenix.disk 0x10000000
Set entry point of the program:
ep 0x0
Check on which port the board is connected to the computer. To do this, run the following command:
ls -l /dev/serial/by-id
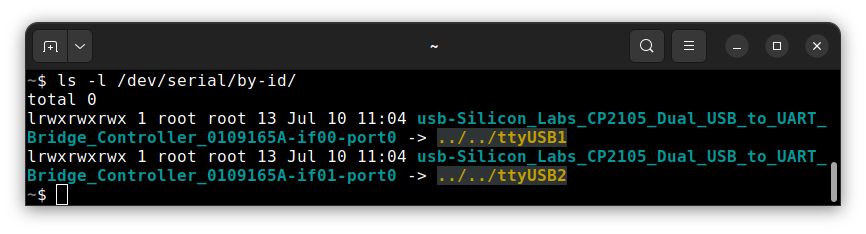
In this case, the serial port to use is /dev/ttyUSB2. Open the terminal emulator and connect to the board using the
following command:
picocom -b 115200 --imap lfcrlf /dev/ttyUSB2
To start the Phoenix-RTOS system, execute the following command in the GRMON monitor:
run
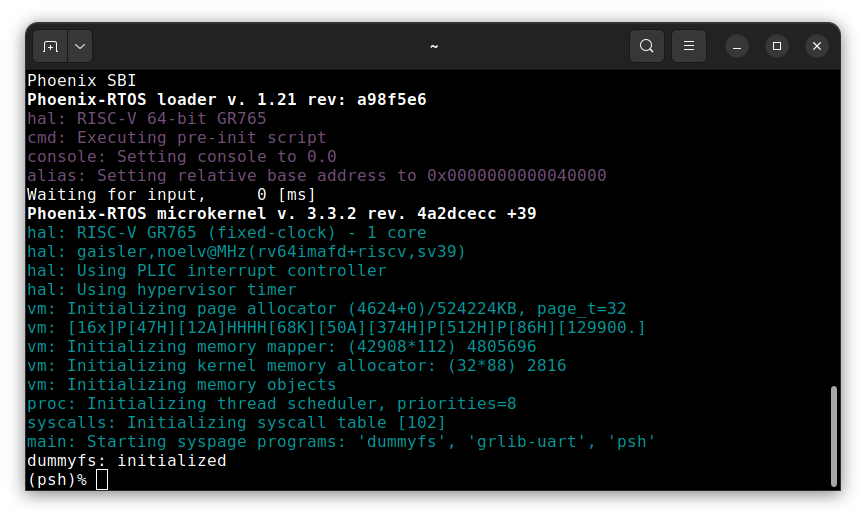
Using the Phoenix-RTOS
After executing the run command, Phoenix-RTOS will be launched and the psh shell command prompt will appear in the
terminal.