Running system on sparcv8leon3-gr716-mimas #
These instructions describe how to run Phoenix-RTOS on the LEON3/GR716 emulated
on Mimas A7 Mini FPGA which is called sparcv8leon3-gr716-mimastarget.
Note that the build artifacts, including the system image should be provided in the _boot directory. If you
have not built the system image yet, please refer to the Building Phoenix-RTOS image section.
Connecting the board#
Connect the board to the computer using a USB cable which provide power to the board (There is pin jumper that determinate which power line will be in use).
Communication with the board in this case is provided via USB-UART converters connected to connector P4
pins
3-tx (E13 - red)&5-rx (D16 - orange)are used for interfacing with thephoenixdserver.pins
7-tx (E15 - yellow)&9-rx (F14 - orange)are used forpsh/ploconsole.pins
37-M4&49-GNDmust be connected via10kohm resistor.
Mimas pinout diagram:
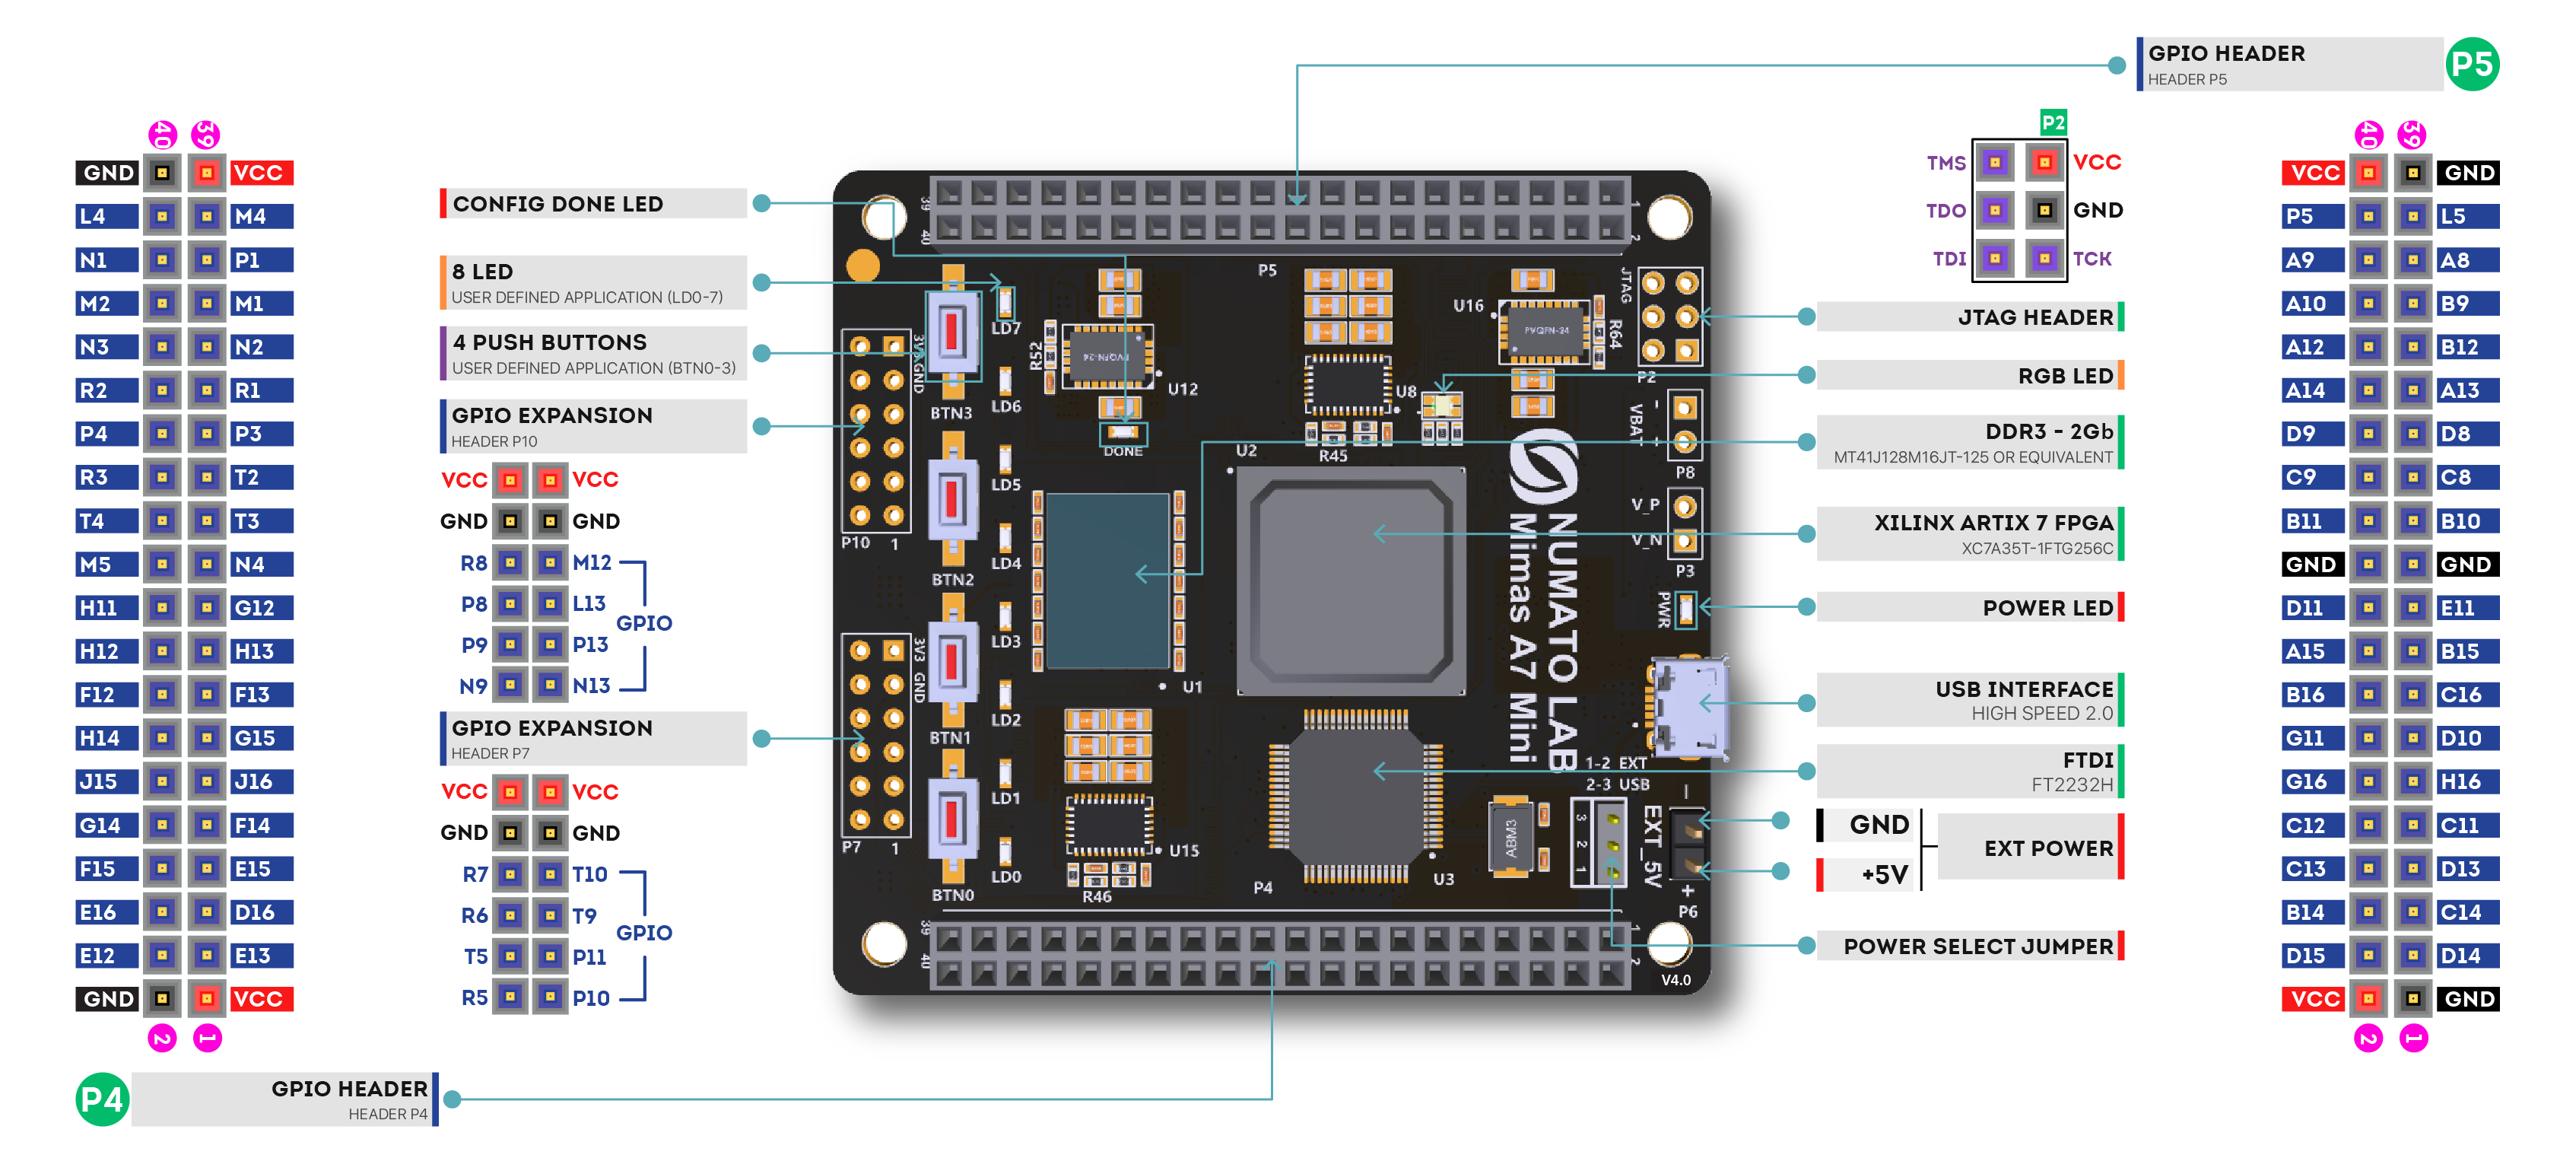
Source: The MimasA7 Mini board’s schematic, available on https://numato.com/product/mimas-a7-mini-fpga-development-board/
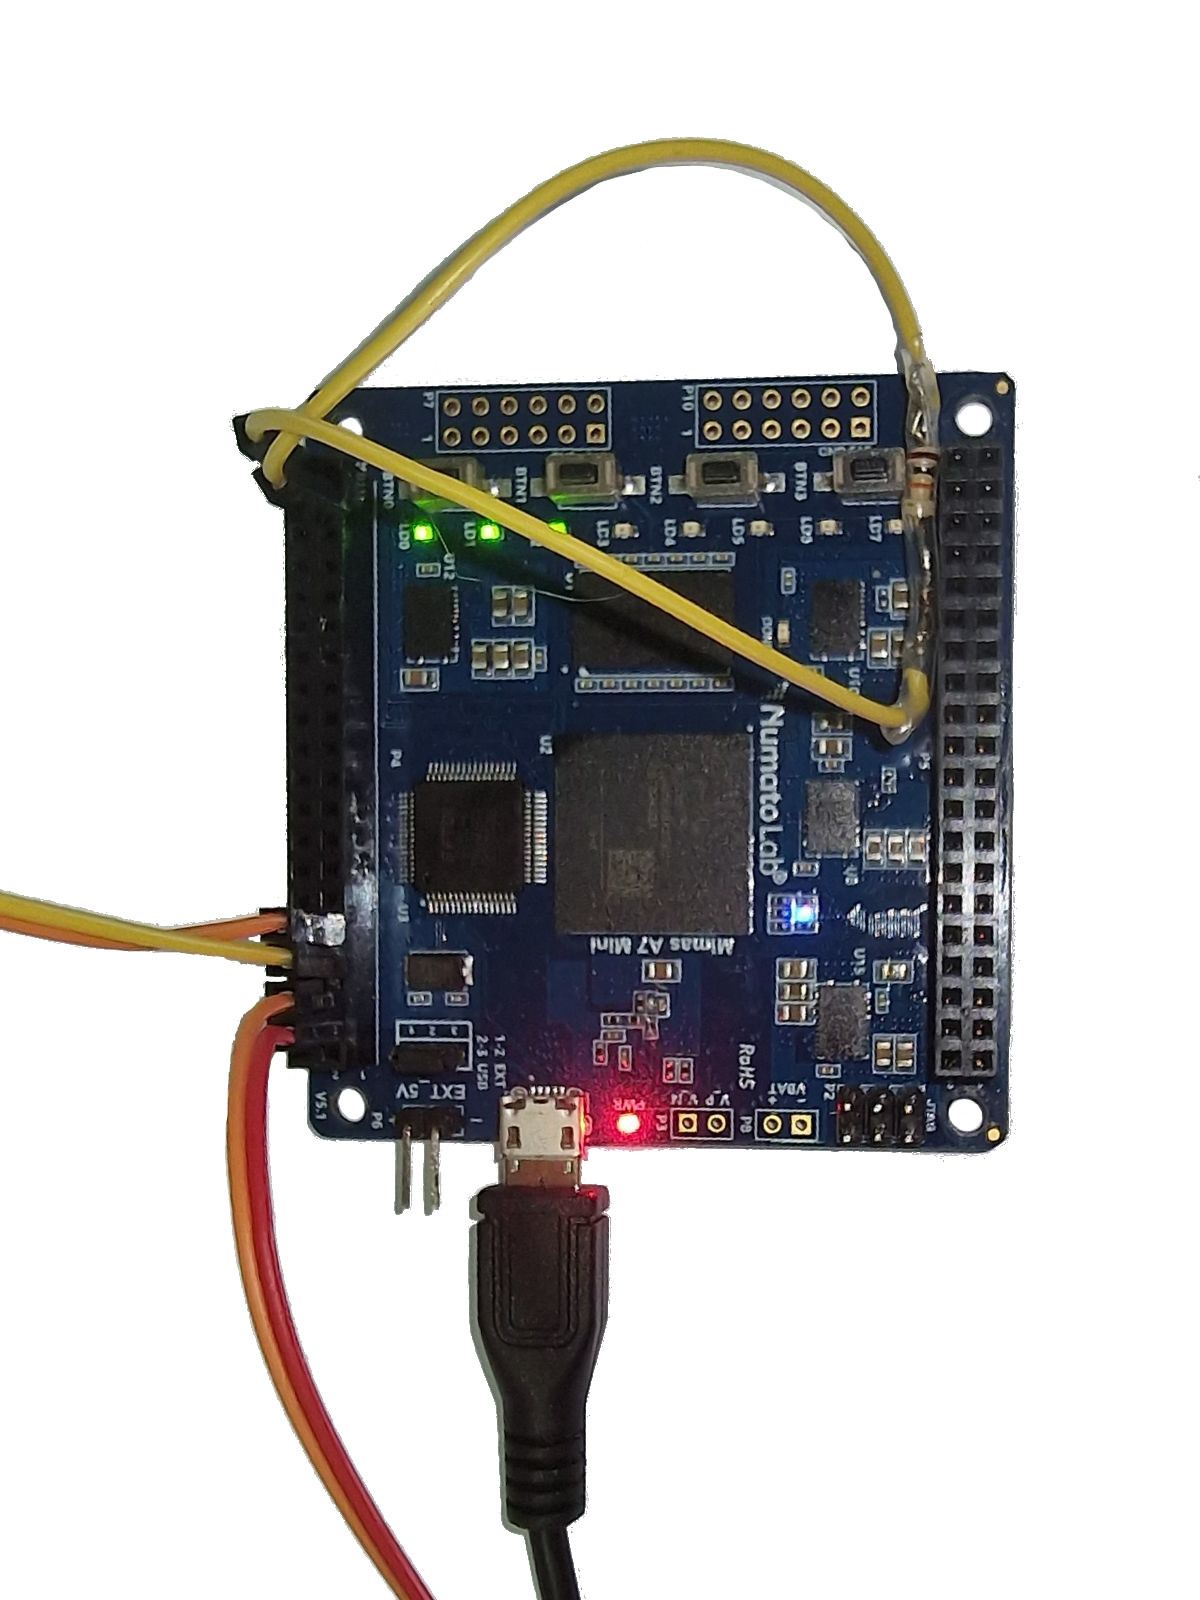
This is how connected device should look like:
Programming Artix FPGA#
All information about preparing and uploading a bit stream for the Mimas A7 Mini can be found in the phoenix-rtos-hdl repository.
Note: Do not run further steps until FPGA isn't programed properly.
Copying system image using PHFS (phoenixd)#
To load the disk image on the board, first step is to verify which device the plo serial interface is connected to
using the following command:
ls -l /dev/serial/by-id
The output of this command depends on what interfaces are used. (Easiest way to determinate which one are correct is run this command, unplug one of them and again using same command check what device disappears).
To provide the disk image to the bootloader, phoenixd has to be launched with the following arguments
(choose suitable ttys device, in this case, USB-UART converter is connected to pins 3 & 5):
-s option to phoenixd determines from where program will upload files to the device. To simplify this process,
we can just move to the desired folder and use . to point to the current directory.
To do that simply type:
cd _boot/sparcv8leon3-gr716-mimas
then
sudo ./phoenixd -p /dev/ttyUSB[X] -b 115200 -s .
In a second terminal start picocom using the following command:
picocom --imap lfcrlf -b 115200 -r -l /dev/ttyUSB[X] --send-cmd cat
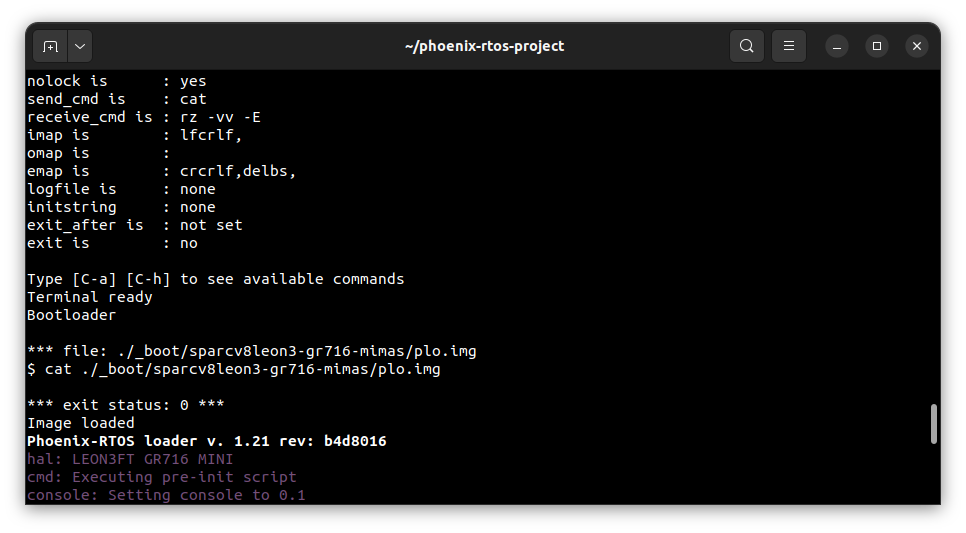
After resetting the board using the BTN0 button, you should see Bootloader message in the terminal. To load the
bootloader (plo) to the RAM, send the image using picocom --send-cmd. Type Ctrl+a followed by Ctrl+s,
enter the path to the plo.img file and press Enter. The file is located in the _boot/sparcv8leon3-gr716-mimas
directory. Refer to the image below:
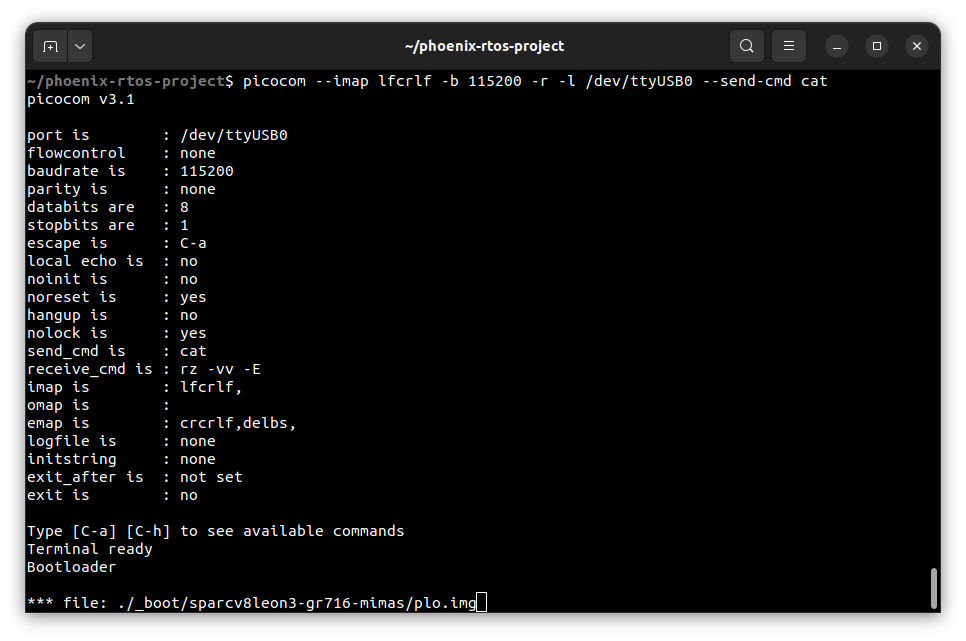
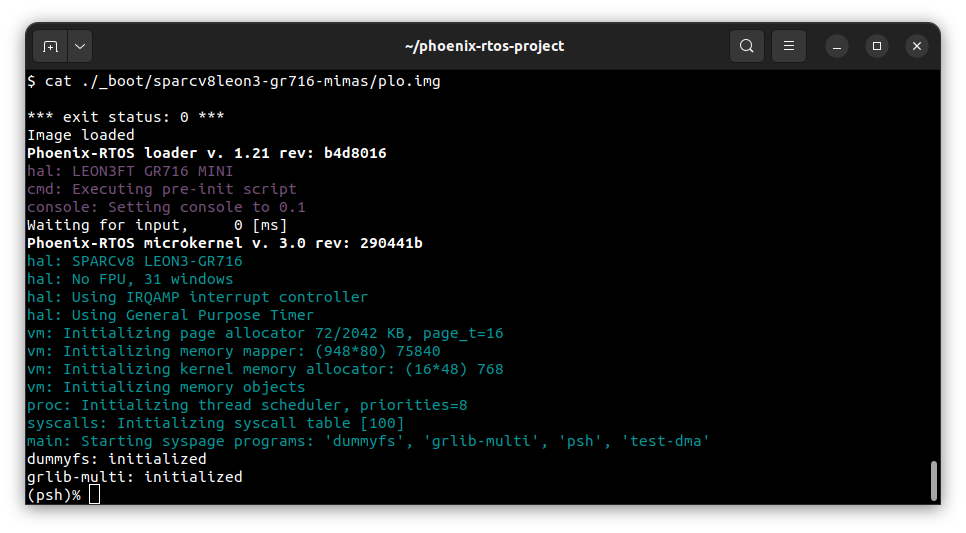
If the image has been loaded correctly, you should see system startup logs.
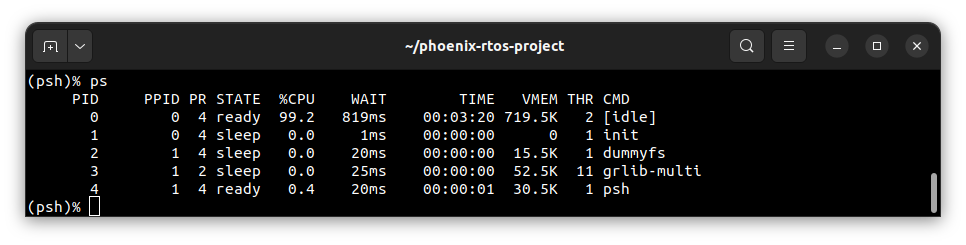
Using the Phoenix-RTOS#
After loading, Phoenix-RTOS will be launched and the psh shell command prompt will appear in the terminal.
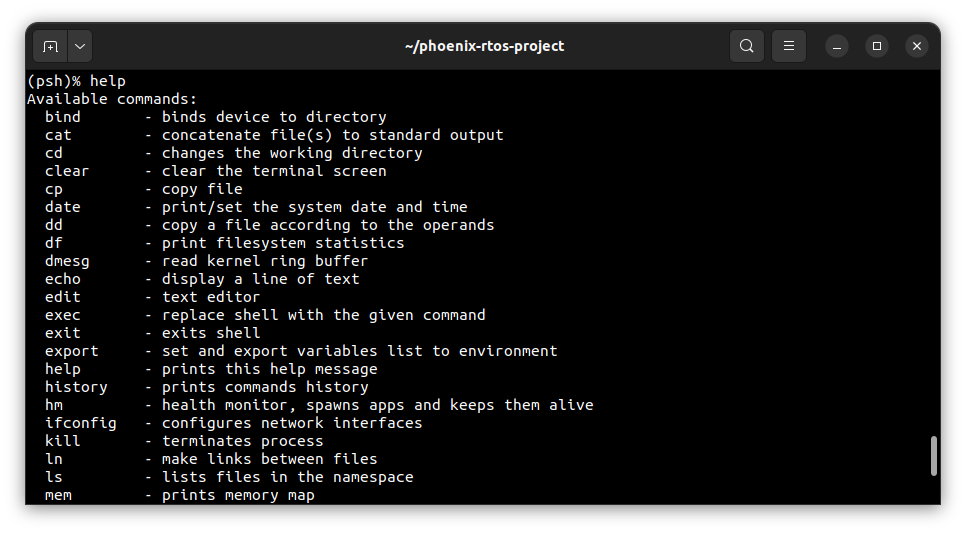
To get the available command list type:
help
To get the list of working processes type:
ps